
Connecting Slack
We handle the hard parts. Connecting Slack should feel like signing into any modern app, not like wrestling with complicated integrations. Here's how it works.
The setup wizard
When you create a new account, the wizard walks you through three steps:
Step 1: Authorize
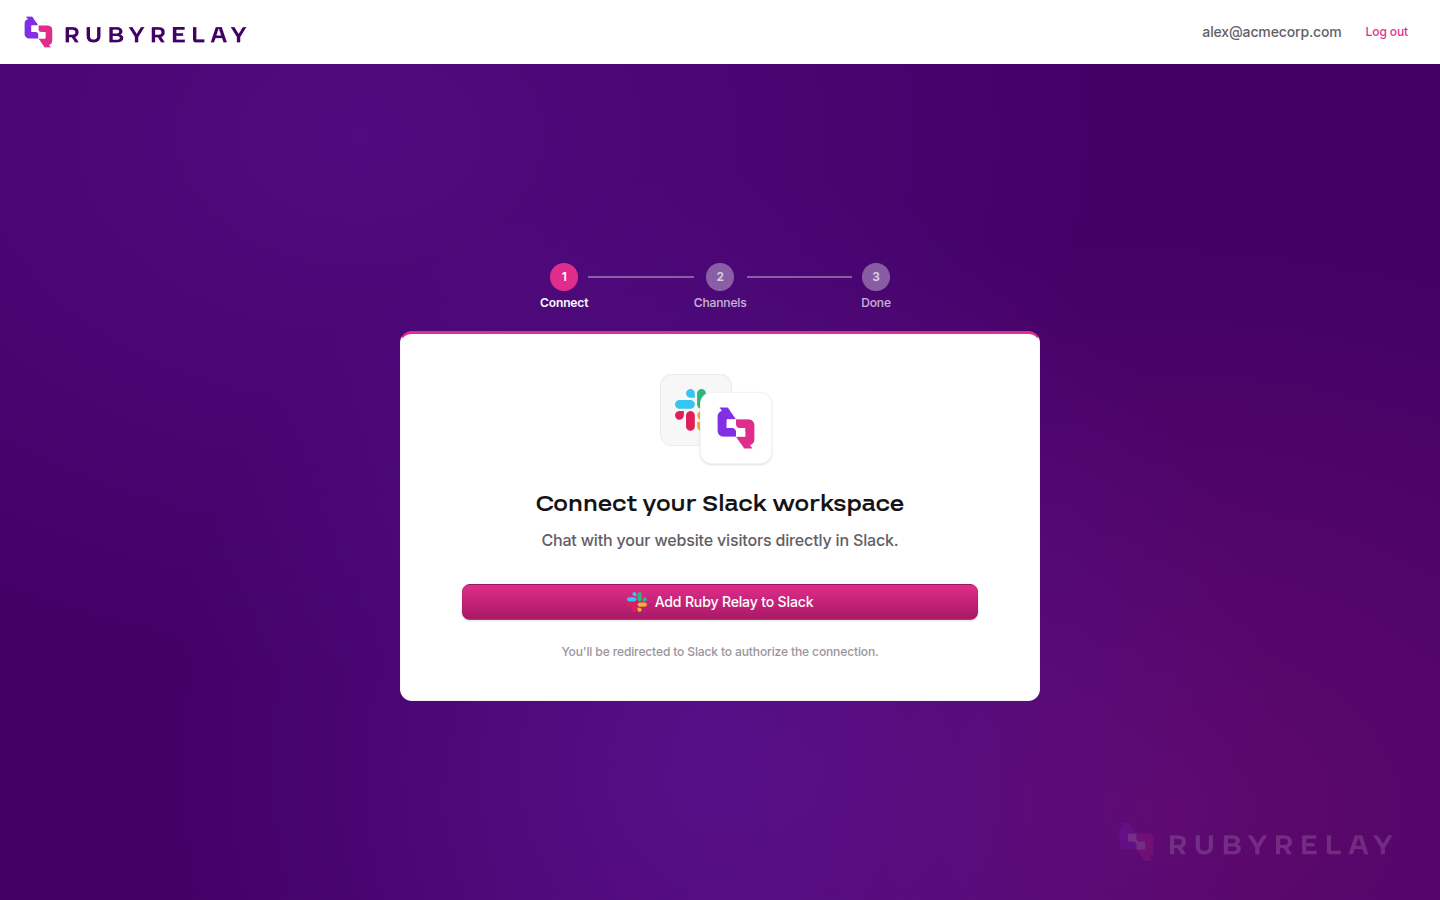
Click Connect to Slack. You'll be redirected to Slack's OAuth page where you authorize Ruby Relay to access your workspace. This uses Slack's official OAuth 2.0 flow. We never see or store your Slack password.
Slack's OAuth screen
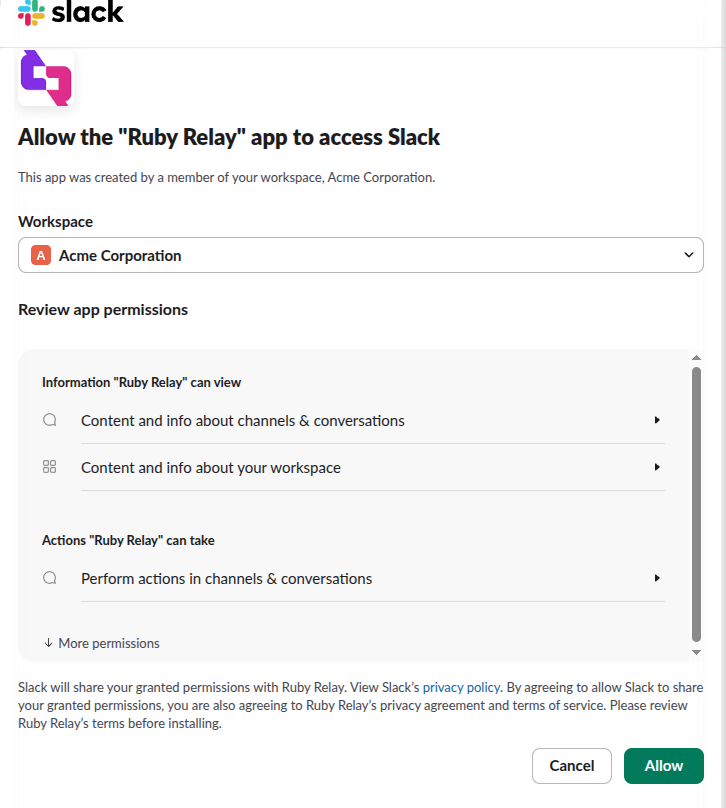
After clicking Connect to Slack, you'll see Slack's permissions screen. Review the permissions and click Allow to authorize the connection.
Step 2: Choose a channel
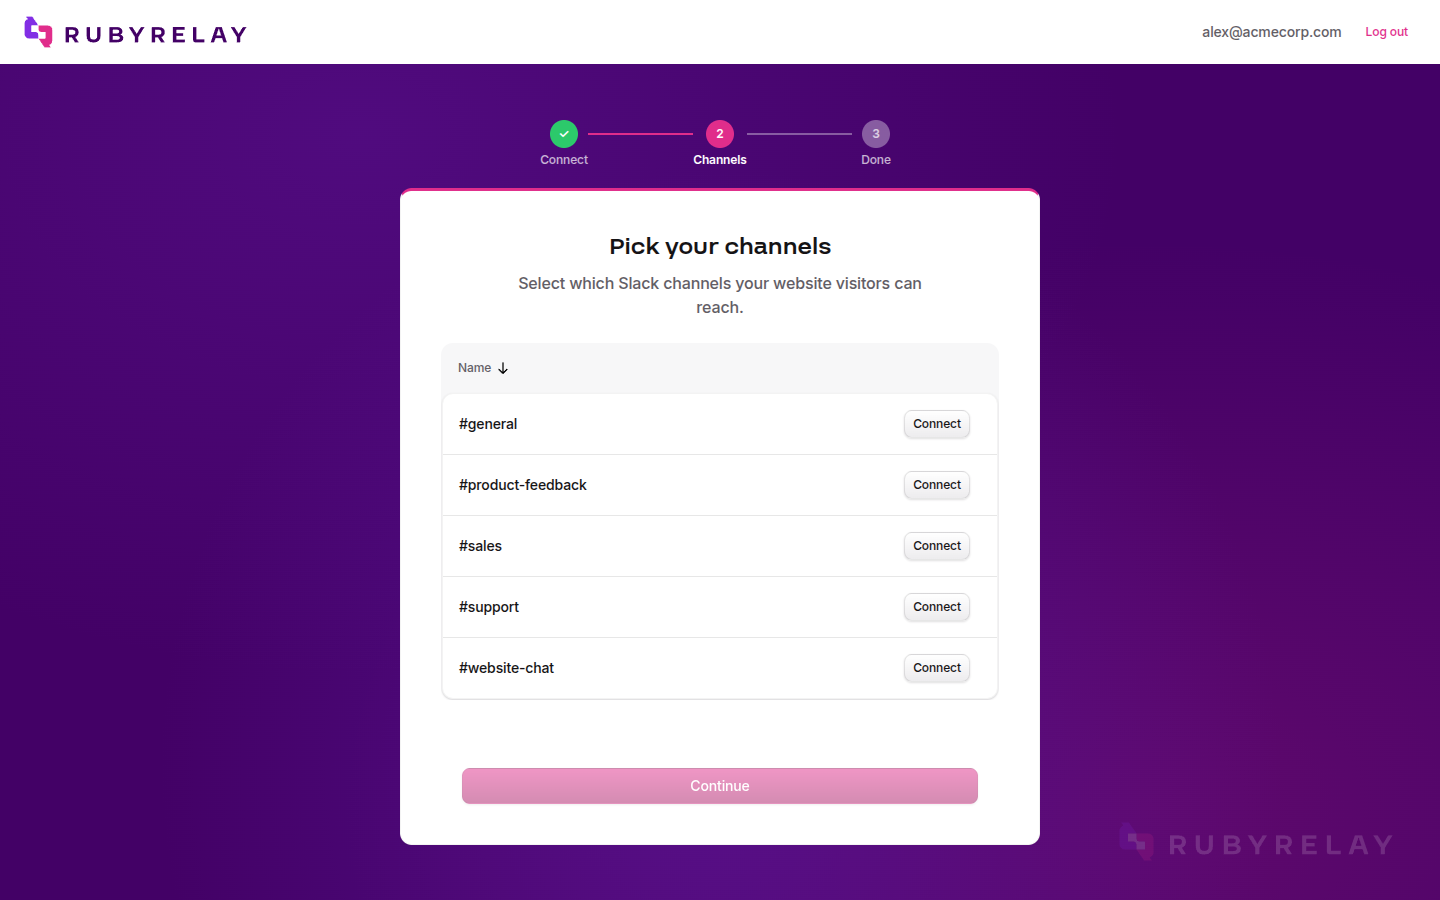
After authorization, you'll see a list of your Slack channels. Pick the one where you want visitor conversations to land. We recommend creating a dedicated channel (like #website-chat or #support-live) so conversations don't get lost in the noise of your general channels.
Step 3: Done
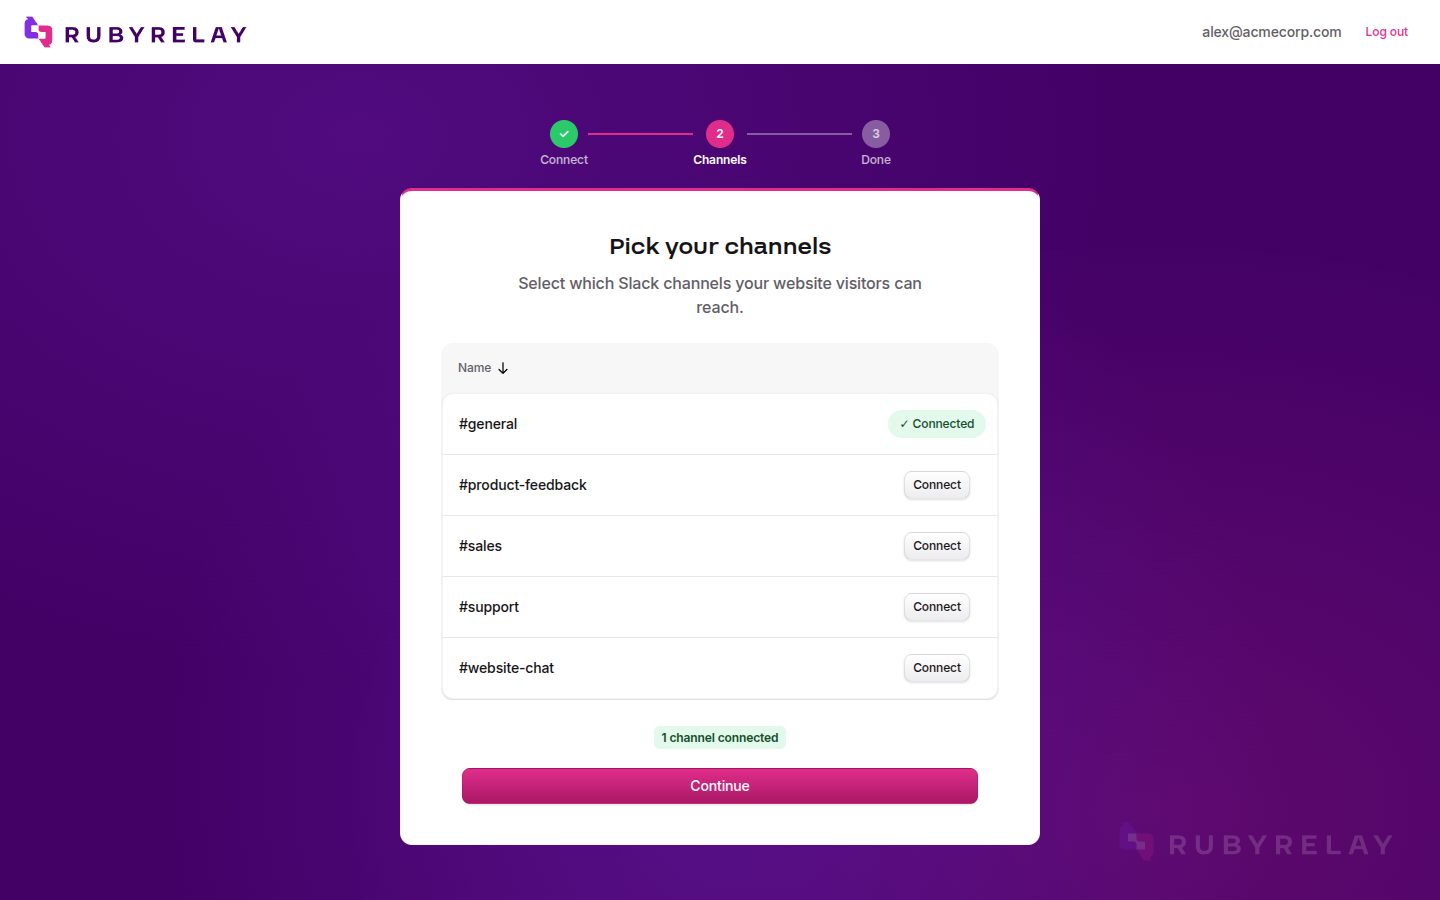
That's it. The wizard confirms the connection, and the whole process takes about 30 seconds. When you're ready to send a test message and watch it land in Slack, open your widget's live preview and switch it to Live mode.
Additional workspaces
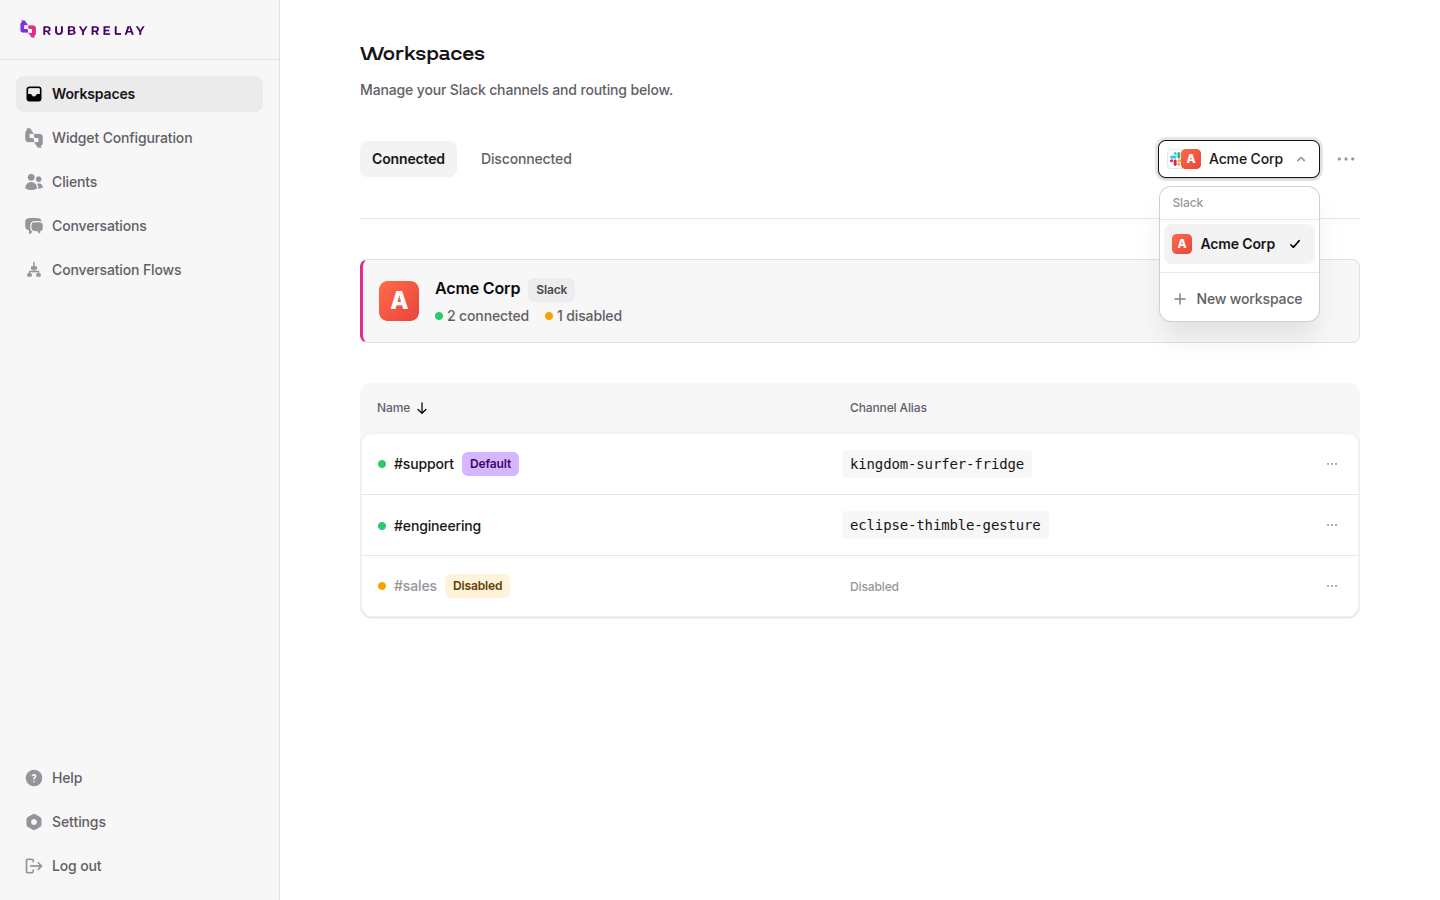
To connect another Slack workspace, go to the Workspaces page and open the workspace selection dropdown in the top-right corner. Select a new workspace from there to kick off the same OAuth flow, then pick which channels to connect. See Managing Channels for working with multiple workspaces.
What permissions and why
When you authorize Ruby Relay, Slack shows its consent screen with every scope at once, which can look like a lot. Here's the honest version of what we actually do with that access:
- We only act on the channels you connect. Relayed visitor messages and your replies flow through the channel(s) you pick, and nothing else.
- We never read your DMs or any channel you haven't connected as a relay channel.
- We never see your Slack password. The connection uses Slack's official OAuth 2.0, and you can disconnect anytime from the dashboard or your Slack settings.
- We never sell, mine, or train on your conversations.
Here's exactly what each scope does, and why we request it:
| Scope | Why we need it |
|---|---|
app_mentions:read | Allow users to interact with Ruby Relay by @mentioning it |
channels:history | Receive real-time messages from public channels to relay back to visitors |
channels:join | Add Ruby Relay to public channels when users configure a new relay channel |
channels:read | List available public channels for channel selection, retrieve channel metadata |
chat:write | Post relayed visitor messages and system notifications into Slack |
commands | Register the /rubyrelay slash command so your team can pull up a cheat sheet inside any channel |
files:read | Read images shared by team members in Slack threads so they can be displayed in the visitor's chat widget |
files:write | Upload images sent by visitors and screenshots captured via !!screenshot into Slack threads |
groups:history | Receive real-time messages from private channels (same as public) |
groups:read | List available private channels for selection, retrieve metadata |
reactions:read | Detect the ✅ a teammate adds to a thread to resolve a conversation in Ongoing Conversations mode |
reactions:write | Add the ✅ when a conversation is resolved by command and the ⏰ when one auto-closes, so resolved and timed-out threads read at a glance |
team:read | Retrieve workspace name and icon for the Ruby Relay dashboard |
users:read | Look up display names of Slack users who reply in relay threads |
Channel selection tips
- Create a dedicated channel. Something like
#website-chatkeeps live conversations separate from your team's regular chatter. - Set channel notifications to "All new messages." You don't want to miss a visitor because Slack decided it wasn't important enough for a notification.
- Pin a welcome note explaining that this channel is for live visitor chat, so teammates aren't confused when messages start showing up.
- Consider multiple channels if you have different products or sites. See Managing Channels for routing strategies.
How Slack threads work
Every new visitor session creates a new thread in your connected channel. Here's how the flow looks:
- Visitor opens the widget and sends a message.
- Ruby Relay posts the message to your channel as a new thread, with context like the page URL and visitor session info.
- Your team replies in the thread.
- The reply appears in the visitor's chat widget in real time.
- If the visitor sends follow-up messages, they're added to the same thread. One conversation, one thread.
Sessions time out after 90 minutes of inactivity. If the visitor comes back after that, a new thread starts. This prevents zombie threads that go on forever.
On the Growth and Scale plans you can switch on Ongoing Conversations, which keeps a thread open until you resolve it (or it sits idle for 14 days) instead of timing out at 90 minutes, so a returning visitor stays in the same thread.
Text replies and images are relayed to the visitor in real time. When a team member shares an image in the thread, it appears inline in the visitor's chat widget. Visitors can also send images back (via paste, drag-and-drop, or file picker), and those appear in the Slack thread. Other attachment types (PDFs, zip files, etc.) are not currently relayed.
Thread commands
Thread commands let you control how Ruby Relay handles individual messages. Include a command anywhere in your thread reply and Ruby Relay will act on it before processing the message.
| Command | What it does |
|---|---|
!!ignore | Prevents the message from being relayed to the visitor. Use this for internal coordination, side conversations, or notes your team needs to see but the visitor shouldn't. |
!!close | Ends the visitor session immediately instead of waiting for the 90-minute inactivity timeout. The visitor's next message will start a fresh thread. |
!!resolve | A synonym for !!close, the natural word to reach for when you're resolving a conversation rather than ending a session. |
!!screenshot | Requests a screenshot of the visitor's screen. The visitor sees a permission prompt and can allow or decline. See below for full details. |
Commands can appear anywhere in the message, not just at the start. A reply like "checking with engineering !!ignore" works the same as "!!ignore checking with engineering". The entire message is suppressed either way. A !!close message is also not relayed to the visitor.
With Ongoing Conversations enabled, !!close (or !!resolve) marks the conversation resolved instead of just ending the session, and you can also resolve a thread by reacting to it with ✅.
The !!screenshot command
Sometimes text isn't enough to diagnose a problem. The !!screenshot command lets you request a screenshot of the visitor's current page, so you can see exactly what they're seeing.
How it works
- Type
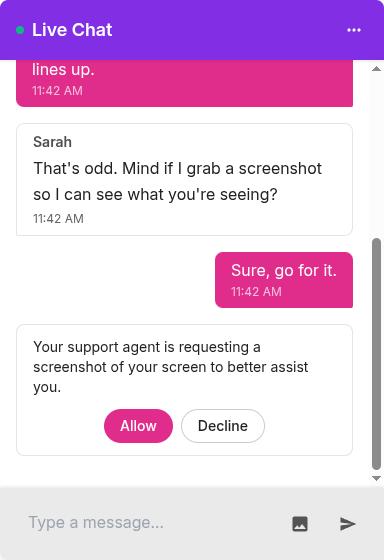
!!screenshotin the Slack thread. The message won't be relayed to the visitor. - The visitor sees a prompt in the chat widget asking for permission to capture their screen.
- If the visitor clicks Allow, the widget captures a screenshot of the page and uploads it. The image appears both inline in the widget and in your Slack thread.
- If the visitor clicks Decline, you'll see "User declined the screenshot request." in the thread.
- If the capture fails for any reason, you'll see "Screenshot capture failed on the user's device." instead.
What gets captured (and what doesn't)
Screenshots are captured in-browser using an HTML rendering approach. This means the visitor never has to install anything or grant browser permissions, but it comes with some trade-offs:
- Captured: HTML, CSS, and inline images render accurately, which covers the vast majority of web content.
- Not captured: cross-origin iframes (embedded maps, third-party widgets), canvas elements (WebGL, some charting libraries), and playing video or audio.
- Pages taller than 4,096 pixels are clipped at that height.
The visitor always has to explicitly allow the capture. Only the browser page content is included, not browser chrome, other tabs, or anything else on their screen.
The /rubyrelay slash command
Ruby Relay registers a Slack slash command the moment you connect your workspace. Type /rubyrelay in any channel and Slack fires back an ephemeral message (only you see it) with a cheat sheet of everything you can do in a relay thread.
It covers:
- The thread commands (
!!screenshot,!!close,!!resolve,!!ignore) with one-line descriptions so you don't have to remember which is which. - A direct link back to this help center for the full docs.
Because the response is ephemeral, nothing posts to the channel and your team doesn't see you looking up the docs. It's a quiet "how did that command work again?" button you can hit from anywhere, including channels Ruby Relay isn't relaying from. Great for onboarding new teammates: they don't have to go hunting for a link, the slash command is right there.
Troubleshooting
Messages aren't showing up in Slack
Check that the Ruby Relay bot is still in the connected channel. If someone removed it, re-add it or reconnect the channel from the dashboard.
Replies from Slack aren't reaching visitors
Make sure you're replying in the thread, not as a standalone channel message. Only threaded replies get relayed back to the widget.
OAuth keeps failing
You need permission to add apps to your workspace to authorize the integration. Many workspaces also require a Workspace Owner to approve new apps before they finish installing (see below). If you're stuck, loop in a Workspace Owner.
Not a Workspace Owner? The install needs Owner approval
By default, Slack only lets Workspace Owners approve new apps. If app approval is turned on for your workspace, a Workspace Admin (or any member) can start the Ruby Relay install, but it stays pending until a Workspace Owner approves the request. Slackbot DMs that request to your Owners by default, or they can find it under Settings & administration Manage apps. Once an Owner approves, come back and finish the setup. (Owners can delegate approval to Admins or app managers, so in some workspaces an Admin can approve it too.)
Still stuck? See the full Troubleshooting guide or email us at support@rubyrelay.com.