
Installing the Widget
This takes 30 seconds. We've timed it. Twice, actually, because the first time someone said "no way" and we had to prove it.
CDN / script tag
The fastest path. Paste this snippet into your site's <head> or just before </body>:
<script src="https://cdn.rubyrelay.com/widget.js" defer></script><script>window.RubyRelayWidget.init({apiKey: "YOUR_API_KEY",});</script>
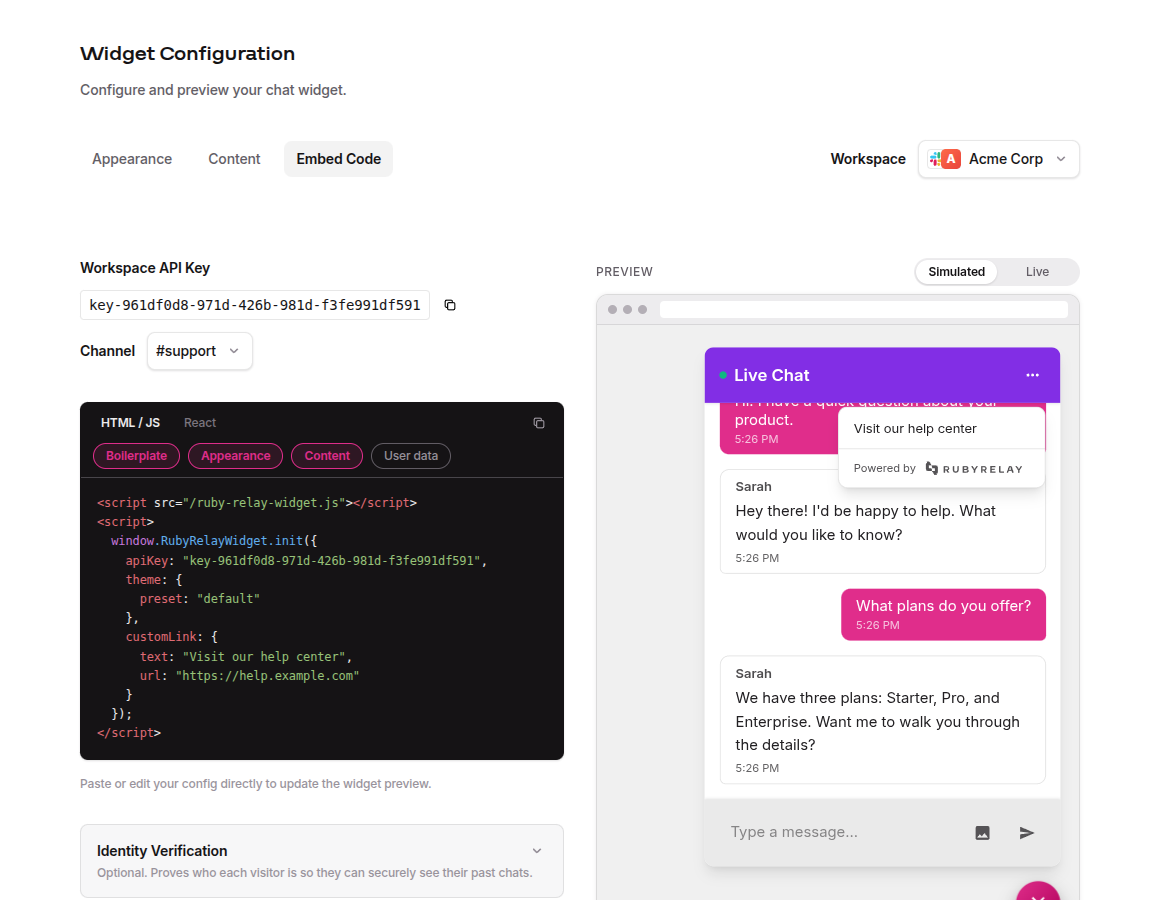
Replace YOUR_API_KEY with your workspace API key. You'll find it in your dashboard on the Widget Configuration page, under the Embed Code tab. One key covers your whole workspace, so the exact same snippet works on every page and every site you run. The widget loads asynchronously, so it won't slow your page down.
React / NPM
If you're in a React (or Next.js, Remix, Vite) project:
npm install ruby-relay-chat-widget
Then drop the component wherever you want it to mount:
import { RubyRelayChat } from "ruby-relay-chat-widget";export default function App() {return (<>{/* your app */}<RubyRelayChat apiKey="YOUR_API_KEY" /></>);}
The component handles its own lifecycle. It mounts the widget when your component mounts and cleans up on unmount, no useEffect gymnastics required.
For configuration options and customization details, see Customizing Your Widget.
Choosing a channel
By default, every conversation goes to your workspace's default channel, the one Ruby Relay routes to automatically. That's your first connected channel unless you pick a different one, and for most sites it's all you ever need to think about.
Want a specific page or site to reach a different channel? Add that channel's alias to your snippet with the channel option. Every connected channel has a short, memorable alias like eclipse-thimble-gesture that you can copy from the Workspaces page in your dashboard:
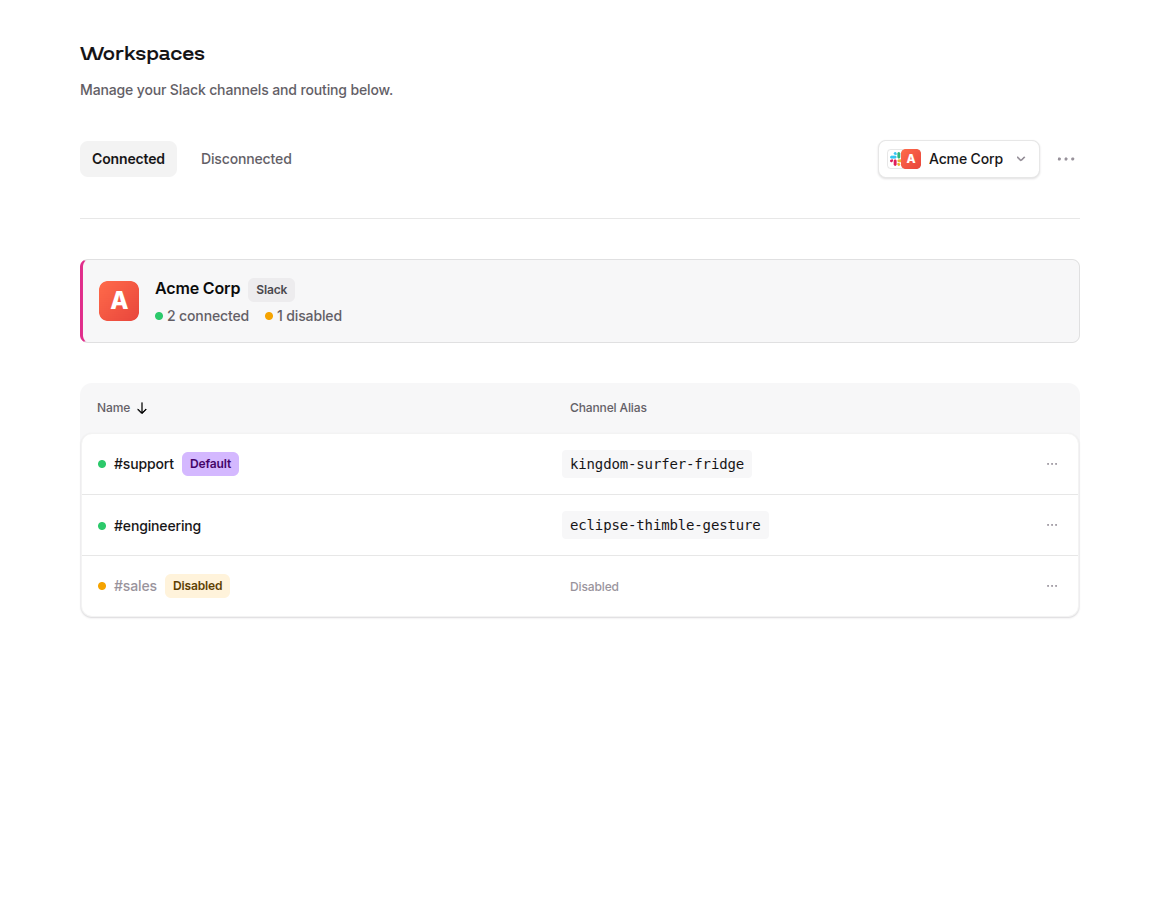
window.RubyRelayWidget.init({apiKey: "YOUR_API_KEY",channel: "eclipse-thimble-gesture",});
The channel option works the same way on the React component (channel="eclipse-thimble-gesture"). Leave it off and chats land in your default channel. For the full routing rules, see Managing Channels.
Verify your installation
Once you've added the snippet:
- Open your site in a browser (or localhost for dev).
- Look for the chat bubble in the bottom-right corner.
- Click it, type a message, and check your connected Slack channel.
- Reply from Slack. The visitor should see your response in the widget.
If the bubble doesn't appear, open DevTools and check the console for errors. Common culprits are covered in Troubleshooting.
Platform-specific notes
WordPress & WooCommerce
We have an official plugin. Install it from the WordPress Plugin Directory, paste in your API key, and you're live. No theme edits, no snippet wrangling. Works on plain WordPress and WooCommerce stores. See WordPress & WooCommerce for the full walkthrough.
Shopify
Go to Online Store Themes Edit Code, open theme.liquid, and paste the snippet just before the closing </body> tag.
Single-page apps (SPA)
The React package is the cleanest option. If you're not on React, the CDN script works fine in any SPA. Call window.RubyRelayWidget.init() after your app mounts. The widget handles its own routing-aware lifecycle, so it won't remount on navigations.